Table of Contents
Fuel Scooping in Elite Dangerous
Since Elite Dangerous Beta 3 it has been possible to scoop fuel from stars to replenish your fuel tanks. This is useful if your ship has high fuel consumption and you dont want to (or cant!) pay for the normal refill at a station, or you are out exploring and there is no where to refuel!
Points to note:
- You can't scoop fuel up and sell it later at stations - you can only refill your own fuel tanks.
- Not all star types are scoopable (type DA, DC, L, T, TTS & Y are not scoopable), and some are scoopable but the heat you gain will be too high
- The general rule is that the yellow/orange stars are the ideal ones to scoop from.
The units of the fuel scoop are in KG/s. You need 1000 KGs to create a single tonne of fuel. So if you are scooping fuel at 10/s, you will need to wait about 1 and a half minutes to collect a single tonne of fuel. (1000/10 = 100 seconds, which is 1.67 minutes).
Fuel Scooping Guide
- Fuel can only be scooped from stars. It is going to get very hot so let your ship cool down to normal levels before you approach or you'll suffer hull damage
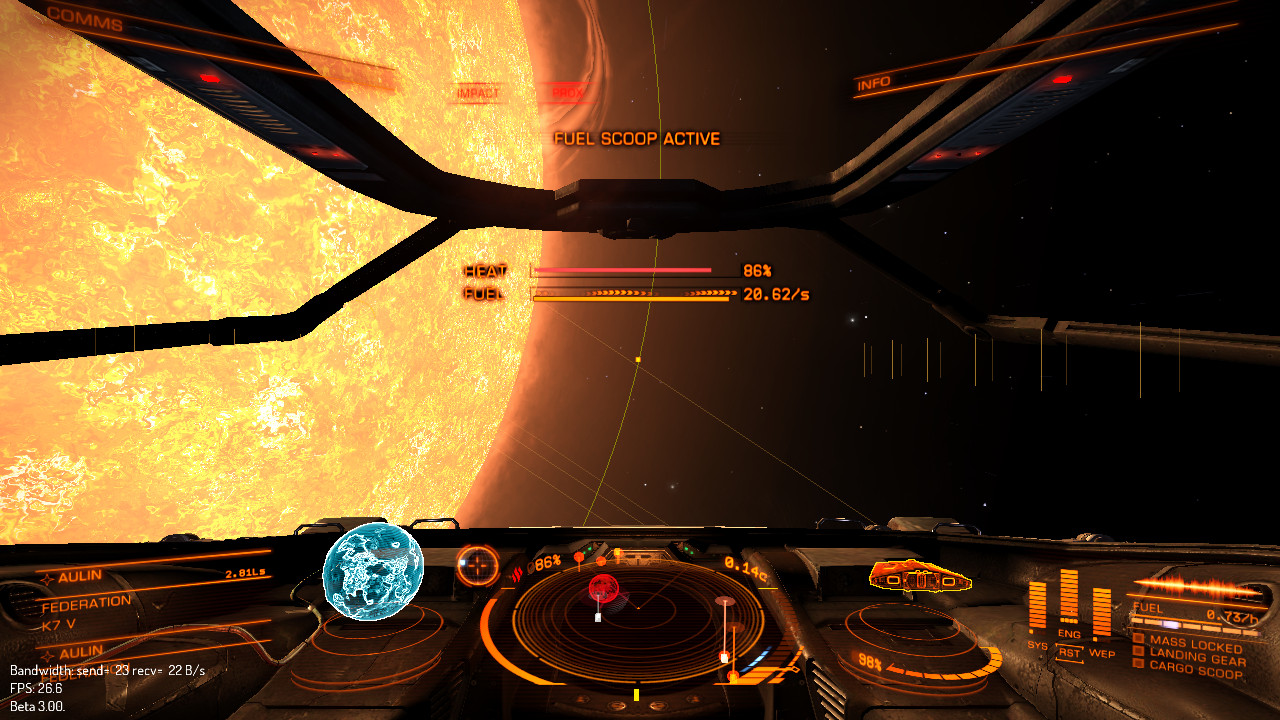
 Fig 1 - Scooping fuel
- Approach the star at a fairly slow super cruise speed - about 0.1c is a good speed. Try to aim your ship so that it is just outside of the star's yellow “safe distance” outline and fly towards it.
- Once your scoop activates you should slow down to zero (actually about 30km/s is the minimum you can go in SC).
- Sit there at 30km/s for as long as you need to.
- You can try to increase the collection rate by moving closer.
- However, keep an eye on the temperature gauge. There should be a point where you can scoop at the maximum rate without the temperature continuously rising.
- Scooping rate is based on distance from the corona, rather than speed. If the rate increases as you speed up, it's solely because you're getting closer to the sun. If you slow down, the rate should not drop.
- It's also affected by the angle of your ship to the sun: you need to be facing the sun.
- 10-12/s is a respectable collection rate for an entry-level scoop (higher class scoops can get much higher rates - see below for more details)
- You will now be refilling your main fuel tank (the lower of the two fuel gauges in the bottom right of your HUD).
- Depending on the size of your tank, it may take a while to fill up - several minutes is not uncommon.
- When you are full, the rate will show “0” and there will be a loud clunk.
- By flying at zero throttle (30km/s) you're more likely to lose an interdiction fight, so keep an eye on ships flying behind you on the scanner.
Make sure to keep a close eye on your ship's heat
- It is very easy to quickly heat up and suffer damage, even when quite far away from the star.
- You can safely go over 100%, but when you reach 150%, you will suffer damage.
- Remember that it takes time to get to a safe cooling-down distance, so start to move away well before it reaches 150%.
It is not unusual to have to pitch up away from the star until your heat drops a bit before resuming scooping.
A good tip here is to keep an eye on the fuel scooping-rate - if it is increasing you are getting closer to the star, when it is dropping you are getting further away. This lets you fine-tune your distance from the star and maintain heat at a fairly constant level.
Fuel Scoop Ratings
Different scoops have different scooping rates. The numbers listed here are the maximum possible scooping rates attained at high-speeds. You would usually want to scoop at a speed lower than your maximum as the heat would be significant - a realistic scooping rate would be about 75% of the maximum without overheating.
| Class | Rating | Max Rate | Time/t @ max | Time/t @ 75% |
|---|---|---|---|---|
| 1 | E | 18 KG/s | 56 seconds | 74 seconds |
| 1 | D | 24 KG/s | 42 seconds | 56 seconds |
| 1 | C | 30 KG/s | 34 seconds | 45 seconds |
| 1 | B | 36 KG/s | 28 seconds | 37 seconds |
| 1 | A | 42 KG/s | 24 seconds | 32 seconds |
| 2 | E | 32 KG/s | 32 seconds | 42 seconds |
| 2 | D | 43 KG/s | 24 seconds | 31 seconds |
| 2 | C | 54 KG/s | 19 seconds | 25 seconds |
| 2 | B | 65 KG/s | 16 seconds | 21 seconds |
| 3 | E | 75 KG/s | 14 seconds | 18 seconds |
| 3 | D | 100 KG/s | 10 seconds | 14 seconds |
| 3 | C | 126 KG/s | 8 seconds | 11 seconds |
| 3 | B | 151 KG/s | 6.5 seconds | 9 seconds |
| 4 | D | 196 KG/s | 5 seconds | 7 seconds |
| 4 | C | 245 KG/s | 4 seconds | 6 seconds |
The graph shows the relationships between the different classes and ratings - as you can see a A-rated scoop can be more effective than a low rated higher class scoop.